

How to Layer Music Under a Guided Meditation Without Drowning Out Your Voice
You've recorded a beautiful guided meditation. Your voice sounds warm and clear. You've chosen the perfect background music. But when you layer the two together and hit play, something feels off.
Either your voice gets lost in the music, or the music is so quiet it barely registers, or the whole thing sounds muddy and unprofessional.
This is one of the most common technical frustrations for meditation teachers, hypnotherapists and wellness practitioners who are creating recorded content for the first time. The challenge isn't just about "turning the music down"—it's about understanding how voice and music occupy different parts of the sonic spectrum, how our ears perceive layered audio, and how to use basic mixing techniques to create recordings that feel spacious, clear and professional.
You don't need expensive studio equipment or a degree in audio engineering to get this right. But you do need to understand a few fundamental principles about frequency, volume, and how to make intentional choices in your editing software. This guide walks you through the exact process of layering music under your voice so your meditations sound polished, your words stay clear, and your clients stay focused on the journey you're guiding them through.
If you’re still at the “how do we even capture a clean voice track?” stage, it may be easier to start with our guide on recording guided meditations from home with a simple, reliable setup and then come back here when you’re ready to dress those recordings with music.
Why Simply "Turning Down the Music" Doesn't Always Work
Most meditation teachers start by recording their voice, importing background music into their audio editor, and then adjusting the music volume until it feels balanced. This works sometimes—but often it creates a new problem. At the volume where the music is quiet enough not to compete with your voice, it becomes so faint that it barely provides any emotional support or atmosphere. At the volume where the music feels present and grounding, your voice starts to disappear into the mix.
The reason this happens is frequency overlap. Your speaking voice occupies a specific range of frequencies—roughly 85–255 Hz for most people, with harmonics and consonants extending higher. Many meditation music tracks, especially those with piano, acoustic instruments or prominent mid-range pads, also live in that same frequency zone. When you layer them together, they're competing for the same sonic space, and no amount of simple volume adjustment will fix that.
Think of it like two people trying to talk at the same time. Even if one person is speaking more quietly than the other, it's still confusing and hard to follow because both voices occupy the same tonal range. The solution isn't to make one person whisper—it's to have them speak at different pitches or take turns.
In audio terms, that means you need to either choose music that's deliberately designed with space for voice (tracks that emphasise bass and high atmospheric layers while leaving the mid-range open), or you need to use EQ (equalisation) to carve out that space yourself. Most professional meditation music for practitioners is already mixed with a vocal-friendly frequency pocket, but if you're working with generic ambient tracks, you'll likely need to do some manual shaping.
Step 1: Choose the Right Music for Voice Layering
The easiest way to get a clean mix is to start with music that's already designed for voice work. Not all meditation music is created equal—some tracks are composed as standalone listening experiences with rich melodic content and full-spectrum instrumentation, while others are specifically structured to sit under spoken guidance.
Here's what to look for in voice-friendly music:
Minimal mid-range content. The music should emphasise deep bass (grounding drones, sub-bass pads) and soft high-frequency textures (gentle atmospheric layers, distant chimes) while keeping the 200–2,000 Hz range relatively sparse. This is where your voice lives, and if the music is busy in that zone, you'll be fighting for space no matter how you balance the levels.
Slow harmonic movement. Tracks with constantly shifting chords, melodies or rhythmic patterns will pull attention away from your voice. Look for music that evolves gently over long arcs—more like weather than song structure.
No lyrics, vocals or prominent lead instruments. Anything that sounds like "foreground" content (singing, piano melodies, guitar lines) will compete with your narration. Stick to pads, drones, textures and ambient soundscapes.
Consistent dynamics. Music with big volume swells or sudden quiet sections will force you to constantly adjust your voice level to compensate. Choose tracks with stable, predictable energy throughout.
If you're working with music that wasn't designed for voice layering, you may need to do more manual processing to make it work—which we'll cover in the next sections.
Step 2: Set Up Your Session Properly in Your Audio Editor
Whether you're using Audacity (free), GarageBand (Mac), Reaper, Adobe Audition or any other digital audio workstation (DAW), the setup process is similar. Here's the basic structure:
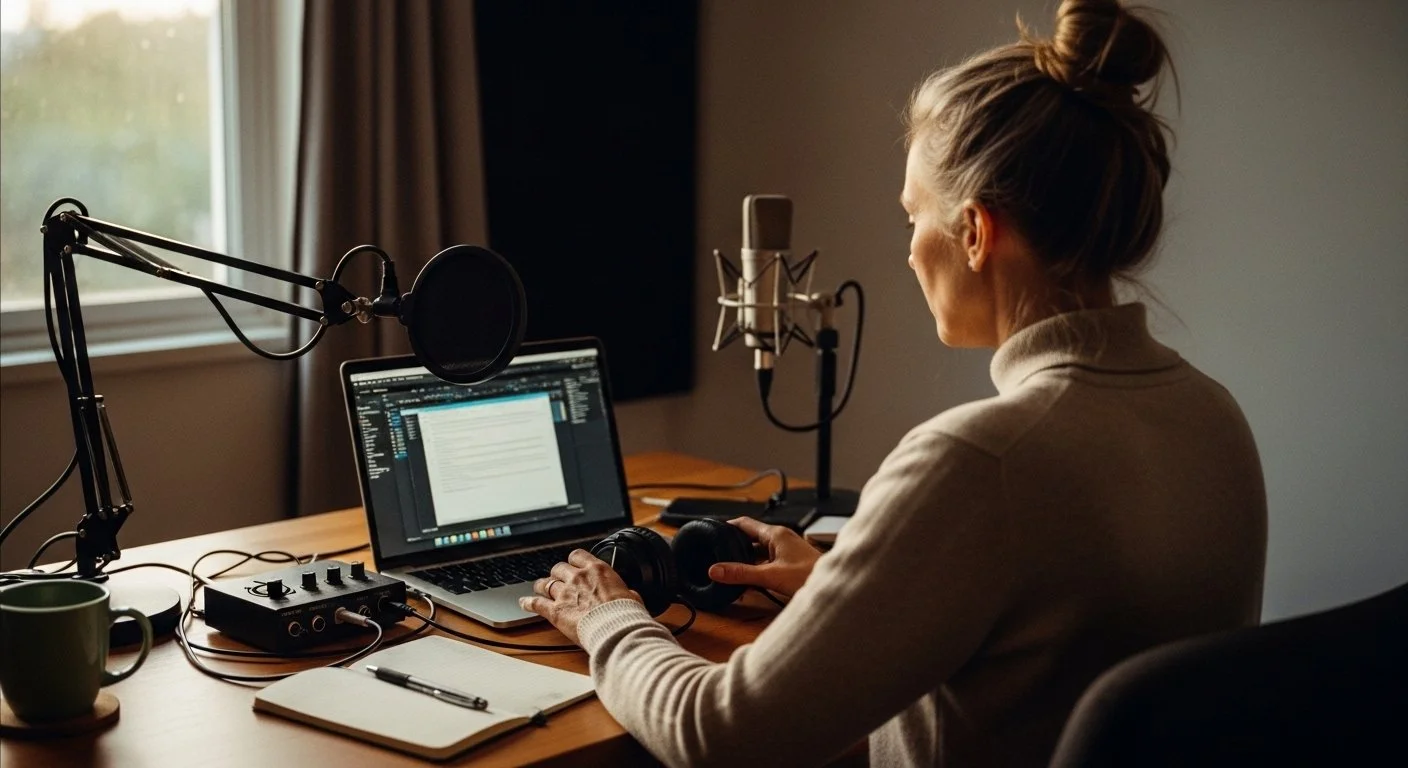
Track 1: Your voice recording. This should be clean, reasonably consistent in volume, and ideally recorded in a quiet space with minimal background noise. If you haven't recorded yet, use a decent USB microphone (even a basic one like a Blue Yeti or Audio-Technica ATR2100 will work), position it 6–8 inches from your mouth, and record in a room with soft furnishings to minimise echo.
Track 2: Your background music. Import your meditation music track as a second audio layer. Make sure the music file is at least as long as your voice recording—ideally longer, so you have flexibility with fade-ins and fade-outs.
Initial rough balance. Before you do any processing, set the music track to roughly −18 to −24 dB quieter than your voice. This is just a starting point—you'll refine it later—but it gives you a baseline where the music is audible but clearly secondary to your narration.
Save your project at this stage so you can always return to the original unprocessed files if you need to start over.
Step 3: Use EQ to Create Space for Your Voice
This is the step most meditation teachers skip—and it's the one that makes the biggest difference. EQ (equalisation) allows you to adjust specific frequency ranges in your music track, effectively carving out a "pocket" where your voice can sit clearly without having to compete.
Here's a simple, effective EQ approach for meditation audio:
Apply a gentle high-pass filter to your music track starting around 80–100 Hz. This removes any extreme low-end rumble or sub-bass that might make the mix feel muddy or heavy. You're not cutting the warmth—you're just cleaning up frequencies that don't serve the meditation.
Create a slight dip in the 200–500 Hz range on the music track. This is the lower-mid zone where many speaking voices have their fundamental tone. By reducing the music by 2–4 dB in this range, you make room for your voice to sit more clearly in the mix without sounding thin or lost.
Optionally, add a subtle boost around 8–12 kHz on the music track to emphasise gentle, airy high frequencies (like soft atmospheric layers or distant textures). This adds a sense of space and openness without competing with your voice.
Most audio editors (even free ones like Audacity) have a built-in EQ tool. You don't need to be precise to the exact hertz—small, gentle adjustments in the general ranges described above will make a noticeable difference.
If this sounds intimidating, here's the shortcut: use music that's already been mixed with vocal space built in. Tracks designed specifically for meditation practitioners are pre-EQ'd to sit cleanly under voice, so you can skip this step entirely and just balance the volume.
Step 4: Balance the Levels (and Trust Your Ears)
Once you've created frequency space with EQ, it's time to set the actual volume balance between your voice and the music. This is more art than science, and it depends on the style of meditation you're creating, the density of your narration, and the role you want the music to play.
For heavily guided meditations (where you're talking most of the way through), the music should be clearly secondary—present enough to create atmosphere but never loud enough to distract from your words. A good starting point is −18 to −24 dB relative to your voice.
For lightly guided or sleep meditations (where you speak for the first 5–10 minutes and then let the music carry the rest), you can afford to have the music slightly more prominent. Start around −12 to −18 dB, and let the music gradually rise in volume after your voice fades out.
For body scans, visualisations or somatic work (where you're guiding with pauses and the music fills the space between cues), aim for a more integrated balance—around −15 to −20 dB—so the music feels like a co-facilitator rather than pure background.
The best way to check your balance is to listen on multiple devices: your studio headphones, your laptop speakers, your phone, your car. If your voice is clear and intelligible on all of them, you've got it right. If the music overpowers your voice on phone speakers (where many people listen to meditations), pull it down a bit more.
Step 5: Use Fades to Create Professional Transitions
Even a perfectly balanced mix can feel amateurish if the music starts or ends abruptly. Fade-ins and fade-outs create smooth, professional transitions that help the meditation feel cohesive and intentional.
Fade in the music gradually over the first 3–5 seconds of your recording. This gives listeners time to settle and orient before the full soundscape is present. Some meditation teachers prefer to start speaking before the music fades in fully, while others like the music to establish the mood first—both approaches work.
If your voice stops before the music ends, consider fading the music up slightly once your narration concludes. This signals to the listener that the guided portion is over and they can now rest in silence or let the music carry them the rest of the way. The fade-up should be gradual (10–15 seconds) so it doesn't jolt anyone out of a relaxed state.
Fade out the music at the end over 10–20 seconds rather than cutting it off sharply. This gives the meditation a gentle, intentional close rather than an abrupt stop that can feel jarring, especially for sleep or deep-rest practices.
Most audio editors have a simple fade tool (usually accessible by selecting a portion of audio and choosing "Fade In" or "Fade Out" from a menu). Use it liberally—it's one of the easiest ways to make your recordings sound more polished.
Step 6: Check for Clipping, Distortion and Overall Loudness
Before you export your final meditation, run through a quick technical checklist to make sure your audio is clean and professional:
Check your master output meter while the track plays. The loudness (measured in dB or LUFS) should peak around −14 to −16 LUFS for meditation content. This ensures your audio is loud enough to be heard clearly but not so loud that it feels aggressive or fatiguing.
Look for clipping or distortion. If your waveform is hitting the top or bottom of the track (creating a flat, squared-off look), you're clipping—which means the audio is distorting. Pull down the volume on both your voice and music tracks until the waveform has visible headroom at the top and bottom.
Listen all the way through at least once before exporting. It's easy to miss sections where the music suddenly gets louder, where your voice drops out unexpectedly, or where a fade doesn't quite work. Catch these issues now rather than after you've published.
Export in a high-quality format. For most meditation content, a 256 kbps MP3 or higher is fine. If you're distributing on platforms that support lossless audio (like direct downloads or some membership sites), consider exporting as WAV or FLAC for maximum quality.
Common Mixing Mistakes (and How to Fix Them)
Even practitioners who've been recording for a while sometimes fall into these traps:
The music is too loud during the introduction. Many teachers want to create a strong atmospheric entrance, so they start with the music relatively prominent—but this can make it hard for listeners to focus on your opening words. Keep the music gentle during the first 30–60 seconds while you establish presence and intention.
The music has sudden volume jumps or drops. If you're using a track that wasn't designed for meditation, it may have dynamic shifts built in. Use your audio editor's volume automation or compression tools to even these out so the music stays consistent throughout.
Your voice is clear in headphones but gets lost on phone speakers. This is almost always a mid-range frequency overlap issue. Apply the EQ technique from Step 3 (cutting 2–4 dB around 200–500 Hz on the music track) and test again.
The meditation ends with awkward silence after the music fades out. If you're creating a timed meditation (e.g., "20-minute body scan"), make sure your music track is long enough to cover the full duration, or plan your voice ending to coincide naturally with the music fade. Unexpected silence at the end can feel disorienting.
A lot of these issues vanish when you choose music that’s both licensed correctly and designed for voice‑led work, so if you’re also planning to publish on YouTube or into paid programs, it’s worth sanity‑checking your soundtrack choices against a straightforward licensing checklist for meditation music before you commit a whole series to one library.
Tools and Software You Actually Need
You don't need expensive gear to create professional-sounding guided meditations. Here's the realistic minimum:
A decent USB microphone (£50–150). Blue Yeti, Audio-Technica ATR2100, Samson Q2U—any of these will work. You're not recording an album, you're recording a human voice for therapeutic listening.
Free or affordable audio editing software. Audacity (free, cross-platform) is more than sufficient for most meditation teachers. If you want something more intuitive, GarageBand (free on Mac), Reaper (£60, very powerful) or Adobe Audition (subscription) are all excellent.
A quiet recording space with soft surfaces (rugs, curtains, upholstered furniture) to minimise echo. You don't need a studio booth—a bedroom or home office with the door closed and soft furnishings is fine.
Headphones for editing so you can hear what's actually in the mix rather than relying on laptop speakers, which are notoriously unreliable for audio work. Even basic closed-back headphones (£30–50) are better than no headphones.
Music designed for voice work. This is where investing in properly structured meditation music saves you hours of mixing frustration. Tracks that are already composed with vocal space built in require almost no EQ or processing—you just balance the volume and you're done.
When to Hire Someone (and When to DIY)
Most meditation teachers can learn to do basic voice-and-music layering themselves with an hour or two of practice. If you're creating a library of meditations for your own clients, a membership site, or occasional YouTube uploads, DIY is absolutely the right approach.
However, there are times when hiring a professional audio editor or mixing engineer makes sense:
You're creating a commercial product (a meditation album, a paid course, an app) where production quality directly impacts perceived value.
You're recording complex audio (multiple voices, layered soundscapes, live sound healing instruments) that goes beyond simple voice-and-music layering.
You've tried DIY mixing and you're consistently unhappy with the results, and the learning curve is taking time away from your actual teaching and client work.
You need the meditation to meet specific technical standards for distribution (e.g., Spotify loudness requirements, Insight Timer audio specifications, app store submission guidelines).
For everything else—weekly meditations, course modules, client resources, YouTube content—learning to do it yourself is faster, cheaper and gives you full creative control.
FAQ: Layering Music Under Guided Meditations
Why does my voice sound muffled when I layer it with music?
This is usually a mid-range frequency overlap issue. The music is occupying the same 200–2,000 Hz zone as your voice. Use EQ to cut 2–4 dB from the 200–500 Hz range on the music track, or use music that's designed with vocal space built in.
How loud should the music be compared to my voice?
For most guided meditations, the music should be −18 to −24 dB quieter than your voice. For sleep meditations or lightly guided content, you can bring the music up to −12 to −18 dB. Always test on multiple devices (headphones, phone speakers, laptop) to make sure your voice stays clear.
Can I just use the "normalize" or "auto-level" feature in my audio editor?
Normalisation adjusts overall volume but doesn't fix frequency overlap or balance issues. It's useful as a final step to ensure consistent loudness, but it won't solve the core mixing challenges. You still need to set proper levels and use EQ if needed.
What file format should I use for meditation recordings?
For most platforms (YouTube, membership sites, direct downloads), 256 kbps MP3 or higher is fine. If you're distributing lossless audio or want maximum quality, export as WAV or FLAC. Check your distribution platform's recommended specs.
Do I need expensive software to get professional results?
No. Free tools like Audacity are more than capable of handling voice-and-music layering for meditation content. You don't need Pro Tools or Logic unless you're doing complex multi-track production.
Should the music play during the entire meditation or fade out partway through?
It depends on your style. For sleep meditations, many teachers fade out their voice after 10–15 minutes and let the music continue. For active guided work (body scans, visualisations), the music usually plays throughout. Match the approach to the intention of the practice.
How do I avoid my meditation sounding like a generic stock audio project?
Use music with emotional resonance and depth, not just "chill background tracks." Record your voice with presence and warmth, not like you're reading a script. And trust that your authentic guidance matters more than perfect production—clients connect with your humanity, not your EQ settings.